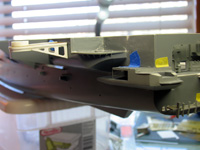
Photos of recent test fit for hangar bay and aft rework.
Click on any image to view larger version...
 |
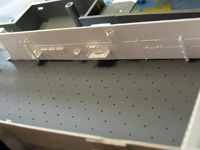
Aft port side of hangar bay, aft of elevator #4. Everthing is currently finished in
gloss white (for decaling). Next step is to apply the "boot strip" around the base of all walls.
|
 |
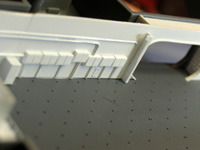
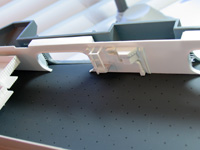
Port side hangar bay forward of elevator #4 showing open armament elevator door (which
will be sitting vertically when mounted) and first batch
of overhead tank racks (still have eight more to build, each consisting of 27 parts). |
 |
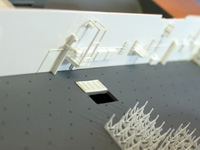
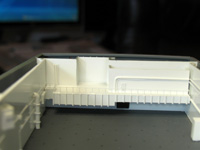
Port forward section of hangar, showing fire door mount and large overhead "box" which
will receive the fabled CV6 mural. |
 |
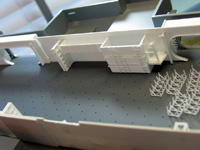
Forward section of hangar bay showing numerous additions that have been made
over the years, including the gymnasium. |
 |
This is the starboard forward section of the hangar, showing the large conflag station.
The large gaps here and there are for the elevator doors. Much of the detail in this shot will not be visible
when everything is buttoned up (without a mirror). |
 |
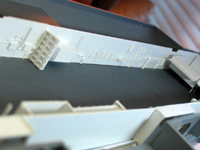
Starboard side, mid section, between elevators #2 and 3. The large boxy section
is the support sturcture for the island. |
 |
Aft of elevator #3, starboard side. |
 |
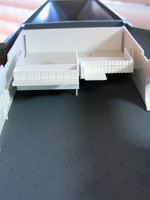
Aft hangar bay area, including the Jet Engine Service station. The double-door in the
aft bulkhead has been opened onto the fantail. |
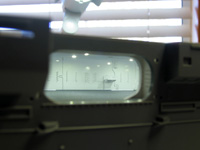 |
This shot shows the hangar bay with the overhead installed, and the white lighting
activated. This is looking thru elevator door #2. |
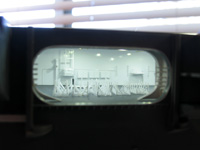 |
Looking thru elevator door #3. |
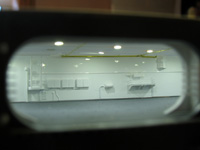 |
Looking thru elevator door #4 (aft port side). |
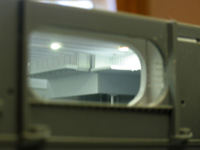 |
Looking thru elevator door #1 up at the gym area. |
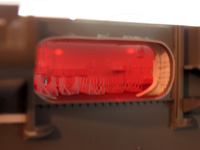 |
This is the red lighting activated. Poor photo but I didn't want
to take the time to drag out the tripod. You get the idea. |
 |
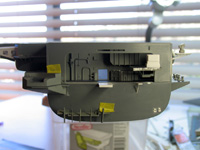
Here the hangar overhead has been removed and flipped over, so you can see
the lighting scheme. Fifty-five white LEDs, and 15 red. Package sizes are 3mm, which scales out to just
under four feet. Perfect. |
 |
Here's the fantail, which is 100% scratchbuilt. More work to be done, obviously.
You can also see the scratchbuilt port CWIS sponson and the stern dock... everything is taped in place at
this point - the dock will be correctly located when installed. The big round drum is part of the jet fuel purification system.
The sheet thickness around the accessway on the port side of the transom bulkhead opening had to be thinned down considerably,
and I broke the plastic: you can see the crack at the bottom of the opening. Also visible are the jet engine test stand
and the dock platform (actually there are two - the other is integrated into the CWIS sponson).
|
 |
This is the starboard quarter showing the updated details (including that large, TAPERED exhaust
plumbing). Also visible is the extension made to the former Sea Sparrow sponson, and that awesome RAM mount. Scratchbuilt
(and to-scale!) bollards are just sitting on sponson: not correctly located. |
 |
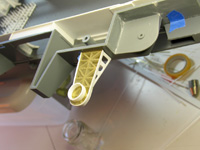
Lower aspect view of the sponson extension. Also visible is the reworked ship's crane support. |
 |
Port quarter showing accurized CWIS sponson and new support for Athena SATCOM antenna. |
 |
Detailed view of the Athena SATCOM support - taped in place. |
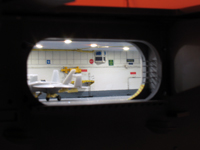 |
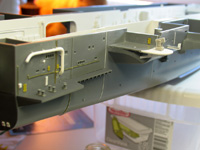
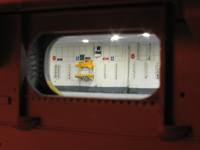
This view is back thru the Elevator #4 opening. Overhead lights are on. As can be seen, the hangar
walls have been painted and decaled. It is worth mentioning that all decals were created using a vector graphics program (Adobe Illustrator)
and printed at very high resolution: most of the placards are legible, even at 1/350 scale. Experimenting with scale effect on the conflag station's
armored windows. The in-process aircraft is the first -E model Hornet to be
built, and has had some PE added. Forty-nine to go. |
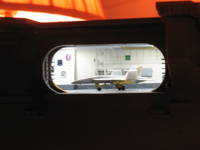 |
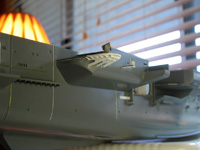
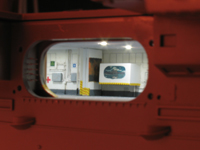
Another view thru #4 opening, this time loooking forward. You can see some of the various squadron
insignia from CVW-1 on the #3 elevator door, which has been placed temporarily (still needs operating rigging). |
 |
Here's a view of the hangar looking thru Elevator #1 opening aft. Visible is a crane winch, conflag station,
and numerous hose racks, along with those ever-present markings. I'm still working on the weathering washes - the effect I want to
achieve is "worn but not dirty," which is sort of hard to achieve in this small scale. |
 |
This is looking thru #2 opening, again to the aft. You can see the midships fire doors comprising six sections
(three per side) which separate the two hangar bays (currently in the fully-open position). As is commonly known, the forward side of these
doors is covered with a mural depicting the first six Enterprise ships, while the structure just forward of these doors on the port side
contains a mural of the seventh and most famous Enterprise, CV-6. The conduits and equipment boxes aft of the fire doors is deceptively
complex: I have spent more time working on the hangar bay alone than on many whole models. I'd estimate this deck to be about 70% complete
(minus the airwing, of course). |
